When a door lock starts sticking, turning loosely, or refusing to latch properly, it’s easy to assume that the entire door needs to go. In most cases, though, the problem lies in the hardware, not the door itself. Replacing a worn-out lock is often a straightforward process that restores both function and security without the expense or hassle of a full door replacement. We’ll walk through how to handle it safely and effectively, step by step.
Recognizing When a Lock Needs Replacement
Every lock shows signs of wear before it fails completely. The first thing we look for is how the key behaves. If it takes more effort to insert or remove, or if it needs wiggling to turn, that’s a sign of worn pins or misalignment. A key that turns without engaging the latch points to internal cylinder damage.
Another common symptom is resistance in the latch. Over time, temperature changes and regular use can cause metal components to warp slightly. When that happens, the latch may no longer align properly with the strike plate on the frame. That doesn’t mean the door itself is warped beyond repair—it often just needs a minor adjustment or a new lock body.
If the handle feels loose, squeaky, or unsteady, the screws inside may have stripped threads or corroded parts. Once rust or internal debris becomes visible, replacement is the safest choice.
Choosing the Right Type of Replacement Lock
When replacing a lock, the first step is to identify the type of lock you already have. Most exterior doors use either a deadbolt, a handle set with a latch, or a combination of both. Interior doors might rely on privacy locks or passage locks.
We always start by measuring the backset—the distance from the edge of the door to the center of the hole that holds the lock. In most Canadian homes, this is either 2 3/8 or 2 3/4 inches. Choosing a replacement lock with the same backset ensures a proper fit without drilling new holes.
The second measurement is the borehole diameter, which typically ranges from 2 1/8 inches for standard locks to 1 1/2 inches for older doors. If the hole is larger or smaller than the new lock requires, a conversion plate can bridge the gap.
When buying a new lock, we also check the door thickness, which should match the manufacturer’s specification. Most modern locks are adjustable, but it’s better to confirm before purchase.
You can find a variety of locks—keyed, keyless, smart, or high-security. If security is your top concern, we recommend consulting a trusted locksmith in Ottawa who can help select hardware that balances convenience, price, and protection.
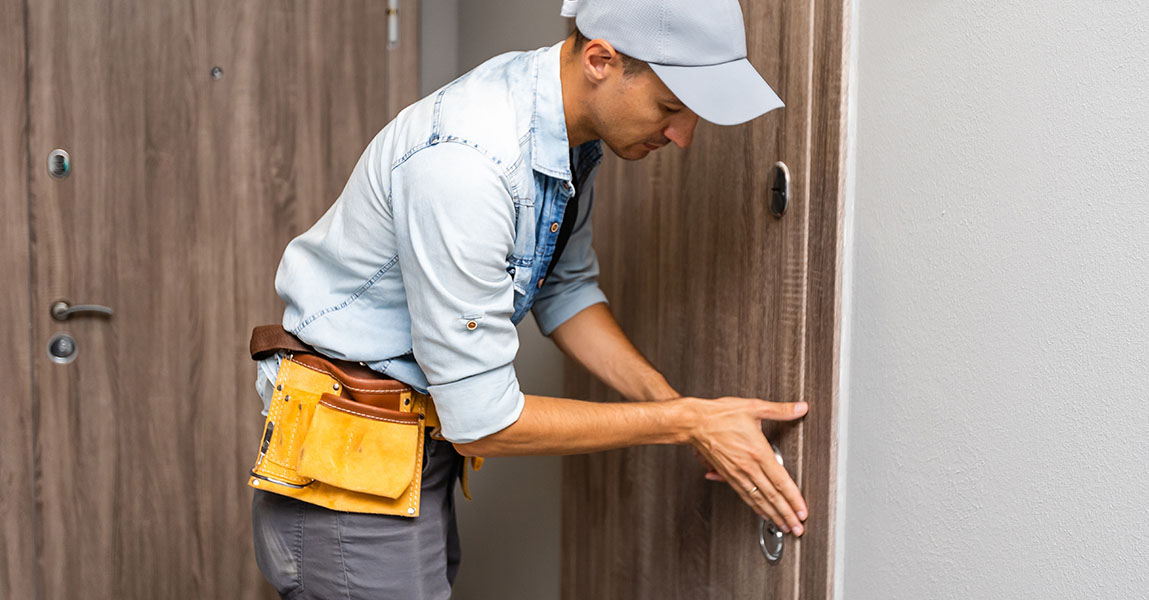
Preparing the Door for the New Lock
Before removing the old lock, we make sure the door is stable. Open it halfway and support it so that it doesn’t move while you work. If it’s an exterior door, place a towel on the floor to protect both the surface and your tools.
Start by unscrewing the lock faceplate, which holds the handle or key cylinder. Most locks have two screws on the inside handle plate. Remove those carefully and pull the handles apart.
Next, remove the latch or deadbolt assembly from the side of the door. You’ll usually find two screws securing it to the edge. Once those are out, pull the mechanism straight out.
Inspect the borehole and latch area for wood chips, splinters, or corrosion. If the edges feel rough, sand them gently. A clean and even surface helps the new lock sit flush and operate smoothly.
If you notice moisture or rust stains inside the cavity, it’s worth applying a bit of rust inhibitor or wood filler to prevent future damage. This small step often extends the life of the new hardware significantly.
Installing the New Lock
Once the old hardware is removed and the holes are prepped, installation is straightforward. Insert the latch or bolt assembly into the side hole, ensuring the slanted edge of the latch faces the door’s closing direction. Secure it with screws, making sure it sits flush with the edge.
Slide the new exterior and interior handles or cylinders through the holes, aligning the connecting bar or tailpiece with the latch mechanism. Tighten the screws gradually to keep everything aligned. Over-tightening can warp the metal or strip the threads, so firm but moderate pressure works best.
Once the lock is secured, test the handle and key before closing the door. The latch should retract and extend smoothly without resistance. If the key feels tight or doesn’t turn fully, loosen the screws slightly and re-test alignment.
For deadbolts, insert the bolt into the extended position and check that it fully engages the strike plate. If it scrapes or stops short, adjust the strike plate position by loosening its screws and moving it slightly up, down, or sideways.
Adjusting the Strike Plate for a Perfect Fit
Even when the lock is installed correctly, the latch or bolt might not line up perfectly with the strike plate on the frame. We often see this problem when weather changes cause wood doors to expand or contract.
To fix it, mark where the latch hits the strike plate using lipstick, chalk, or any visible marker. Close the door gently and open it again. The mark will show where contact occurs. If it’s off by just a few millimeters, you can file the strike plate hole slightly wider.
If the misalignment is greater, repositioning the strike plate is better. Unscrew it, fill the old screw holes with wood filler, and drill new pilot holes in the corrected position. Then reattach the strike plate and test again.
Adding a longer screw to one of the hinge-side strike plate holes can also pull the door frame slightly closer for a tighter seal. This simple trick improves both alignment and security.
Tips to Extend the Life of the New Lock
Locks wear out over time mainly because of dirt, lack of lubrication, and excessive force. Keeping them clean and well-lubricated adds years of reliable use. A silicone-based lubricant works best because it doesn’t attract dust like oil-based products do.
We also recommend avoiding graphite powder in newer locks since it can clog the internal parts. A small spray once or twice a year is enough to maintain smooth movement.
Always use the correct key and insert it fully before turning. Partial turns wear the pins unevenly. If a key starts to feel tight, don’t force it. Clean the keyhole and apply a bit of lubricant first.
For exterior doors, adding a weather seal or door sweep keeps moisture and debris from reaching the internal components. During Ottawa winters, condensation can freeze inside the lock. In that case, gently heating the key with warm (not boiling) water before inserting it can help melt internal frost.
When It’s Better to Call a Professional
Some lock replacements are simple, but others require experience. Doors with electronic locks, mortise locks, or multiple locking points often have complex mechanisms that demand precision. Replacing them incorrectly can affect door alignment or leave the property insecure.
If the lock is part of a multipoint system, or if the latch doesn’t engage even after adjustments, it’s best to consult a professional. A reliable locksmith can replace only the worn components, rekey the new cylinder to match your existing keys, and ensure everything aligns perfectly.
In some cases, especially with older doors, it may be more cost-effective to rebuild or retrofit the locking mechanism rather than replace it entirely. Professional locksmiths have the tools to determine which parts are salvageable and which need to go.
For urgent issues or complex locks, you can always contact us for prompt and professional assistance.
Common Mistakes to Avoid During Lock Replacement
One of the most frequent mistakes we see is over-drilling. It’s easy to think widening a hole will make installation easier, but once you remove too much wood, the lock may never sit tightly again. Always measure twice and test-fit the new hardware before drilling anything.
Another common issue is mixing old and new components. Locks come as sets for a reason—the latch, cylinder, and strike plate are designed to work together. Using parts from different models can cause jamming or misalignment.
Avoid tightening screws unevenly, which can distort the lock’s shape. Tighten each screw gradually, alternating between sides, until everything sits flush.
Finally, remember to test the lock with the door open first. That way, if something binds or sticks, you won’t accidentally trap yourself outside.
Enhancing Security Without Changing the Door
Once the lock is replaced, consider small upgrades that improve strength without altering the door structure. Reinforcing strike plates with longer screws that reach the wall stud increases resistance to forced entry. Installing a door reinforcer or wraparound plate can also strengthen the area around the latch.
Another effective option is adding a high-security deadbolt with an anti-pick design. It fits into the existing hole pattern but provides much greater resistance to tampering.
For rental properties or shared entrances, rekeying the new lock immediately ensures only authorized keys work. Rekeying doesn’t require changing the hardware—it just adjusts the internal pins to match new keys.
Simple Maintenance Routine for Long-Term Performance
After replacing the lock, a brief maintenance routine keeps it working like new. Once a month, wipe the handles and keyhole with a dry cloth to remove dust and fingerprints. Twice a year, apply a quick spray of silicone lubricant.
Check that screws remain tight, especially after the first few weeks of use. Doors shift slightly after installation, and tightening screws ensures everything stays aligned.
If you notice early signs of resistance or a loose handle, don’t ignore them. Small problems grow quickly. Taking five minutes to inspect and adjust can prevent another full replacement later.
FAQ
1. Can I replace a door lock myself?
Yes, most standard locks can be replaced with basic tools. However, for complex or high-security locks, professional help ensures the mechanism is aligned and secure.
2. Do I need to change the whole door if the lock area is damaged?
Not usually. Small cracks or worn holes can be reinforced with wood filler or metal plates. Full door replacement is only necessary for severe structural damage.
3. How do I know if my door lock is compatible with a smart lock upgrade?
Check that the existing holes match the new smart lock’s backset and borehole size. If they do, installation is usually straightforward.
4. What’s the best lubricant for door locks in cold weather?
A silicone-based or Teflon spray works best because it stays effective in low temperatures and doesn’t collect dust.
5. How often should I rekey my locks?
Rekeying is recommended whenever you move into a new home, lose a key, or experience a security concern. It’s a simple way to ensure peace of mind without changing the entire lock.